
Pick the correct roller frame for your DIY painting project.

  We have all heard the saying the devil is in the details. Todays tip may appear as a minor and almost meaningless detail but it could save you a lot of problems with that DIY painting project you have planned.

  A paint roller frame?
     Something as simple and basic to painting today as a brush. What could possibly be a detail that is a need to know?

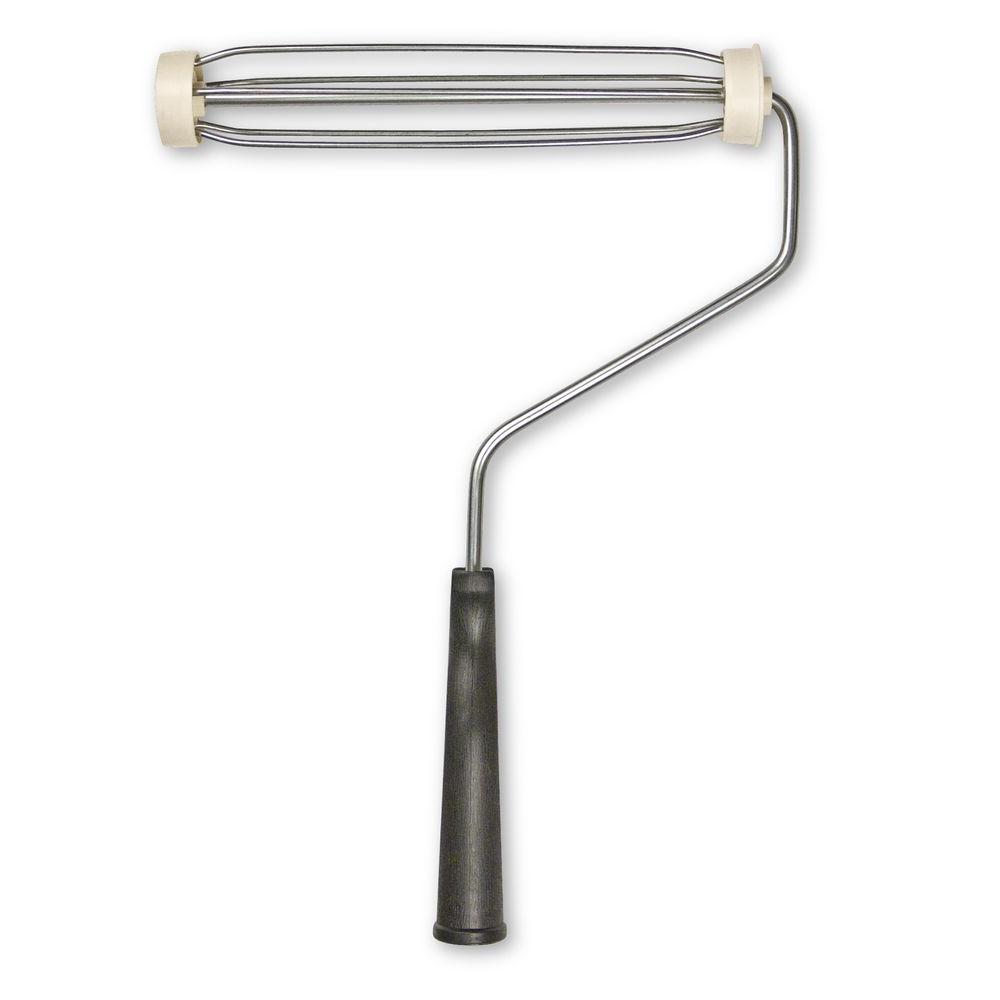
Just take a look at these two examples of roller frames I have here.

See the difference?

   One has a metal ring at the point where the rolling pole screws in and one does not.

Well that chrome ring is not there just for good looks.
   That ring helps prevent the plastic handle from cracking when you screw the roller handle into the frame.

   Screw that rolling pole in just a little to tight in the frame with out the metal ring and it WILL crack and it will no longer work. Just picture yourself just about to finish the last wall and that happens.

   Not only do you have to stop and go back to the paint store buy a new roller frame and likely repaint the entire last wall you were painting when the frame broke. But you may likely need a new roller cover as the one you were using will create one huge mess as you try and remove it from the broken roller frame and put it on the replacement roller frame.

  The cost difference? Less than a dollar. Money well spent.
 

Comments

Popular posts from this blog

How to select that perfect Accent color.

Considering doing an accent wall in the room you are looking to paint but having a difficult time choosing that perfect accent color?    It is most likely your accent wall will be the darker of the two colors you choose. A simple way to help you make this decision is to choose the lighter color first then from the same color sample strip select a color that is the darkest.      This reduces the chance of a clash between the two colors. Selecting a color from a different color strip can be risky.   The two colors may look good in the paint store but when you gat a full room of the colors they may not coordinate as you had hoped.   Keep in mind also that the darker of the two colors may likely need 2 or more finish coat to get the color depth needed. Darker colors contrary to popular belief do not cover as well as most lighter colors today.   The long story made short for this is that the tint used in todays pant is not...

Smoke and Nicotine stains and your painting project.

  Smoke/nicotine stains are a challenge for even the most experienced painter. So as a do it yourself project be prepared. This will not be fun or easy.   First things first. If the wall you are painting have a "flat" finish, washing the walls before priming is a waste of time and money. You will only spread around the nicotine and soak it deeper into the paint that is on the walls now.  If the walls have an "eggshell" or "satin" or "semi-gloss" finish washing can be helpful to a small extent. Areas you should concentrate on is where the stains are the heaviest. This is most often where pictures were on the walls and corners.  Do not invest a lot of time in this step. Just get the heaviest stains removed as best you can.  MATERIALS   You will need a (stain blocking) primer. This is critical as a standard primers will not do the job properly.   This type of primer is most effective if it is oil based. Some brands offer a latex stain b...

Easy steps on How to paint old Furniture.

Looking to update that vintage 1970's furniture with a coat of paint?  For a nice finished product these few steps will help. Step 1 CLEAN!  All of the years of furniture polish, wax, and heavens knows what else that is on the surface of the furniture must be eliminated.    A good detergent like (Mean Green) works well for this first step. Don't saturate the wood with water and detergent just wipe it on and wipe it off. Use lots of clean rages for the wiping off step. All the cleaning in the world does nothing if you don't wipe off with a clean rag. Step 2 Sand. The surface of the furniture is not likely to be ruff but this step helps your primers and paint to bond. 100 grit sand paper should do the job well. You can use steal wool also for those tight spots. Step 3 Vacuum off the dust from the sanding process. Take your time and get all of it. Step 4 Apply the primer. I recommend a product called (Stix) It's a water based...